Okeh, I forgot to mention-- Uninstalling Octoshape.
In case your Octoshape doesnt work, or have any problem, or just you hate it, u want to remove it from your machine. Easy easy...
Just uninstall it from your machine. How to uninstall? Easy easy... -- Delete octoshape folder.
That is all.
If you want it back, re-install and enjoy. That's all. Have a nice day.
Thursday, August 5, 2010
Tuesday, August 3, 2010
Playing your favorite radio station using Octoshape -- Linux
2) Open terminal, go to the path you download the plugin . Then,
3) $ chmod +x octosetup-linux_i386.bin
4) $ ./octosetup-linux_i386.bin
5) Go through the license agreement by clicking enter or space and reply yes when being prompted.
Do you agree to these license terms? [yes|no]
yes
Archive: octoshape.installer.6085
inflating: octoshape/eula.rtf
inflating: octoshape/eula.txt
inflating: octoshape/OctoshapeClient
inflating: octoshape/setup.xml
extracting: octoshape/sua-1002170-0-confirmed.txt
extracting: octoshape/sua-1002170-0-dynfiles.zip
extracting: octoshape/sua-1002170-0-marker.txt
inflating: octoshape/sua-1002170-0-module.xml
inflating: octoshape/sua-1002170-0-OctoshapeClientSUA
extracting: octoshape/sua-1002170-0-OctoshapeClientSUA.sig
inflating: octoshape/sua-1002170-0-suapack-versions.txt
Go to octoshape and execute ./OctoshapeClient -url:octoshape:BROADCASTER.channel
Done installing.
6) You can play the radio at this point. But Octoshape default player is using MPlayer. You can either get MPlayer installed or, change default radio player by editing setup.xml (in octoshape folder)
$ gedit setup.xml
I am using rhythmbox, so I add this option.Add -- PlayerExec="rhythmbox $url"
Save.
7) FINALLY,
For FLY FM listener:
$ ./OctoshapeClient -url:mpb.flyfm.mp3.highFor HOT FM listener:
$ ./OctoshapeClient -url:mpb.hotfm.mp3.highSaturday, July 10, 2010
Streamyx: Sharing Internet on Fedora 12
I'm using streamyx for Internet connection at home. I've a laptop with an Ethernet card and a wireless card. Then, I started to google on how to share internet connection with other laptops using wireless connection since my LAN card is occupied with streamyx cable.
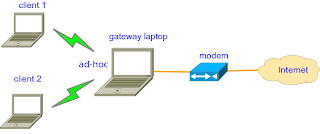
For setting up my machine as a gateway, it quite similar to previous post here, but it can simply be done by configuring firewall. Then, we can create an Ad-Hoc connection so that other machines (client) can simply connect to my laptop without the need of access point. In addition, in order to automatically configure IP address, gateway and DNS server address on client machine, we can set up DHCP server in the laptop (gateway machine). Following are the steps for make it works :
Note that all configuration is done on gateway machine.
Step 1: Connect to streamyx
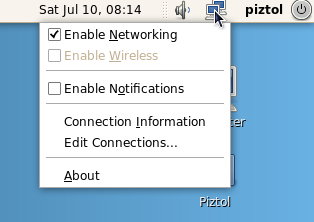
Right-click on network manager applet, then choose 'Edit Connections..'
Select DSL tab and click 'Add' to add new connection. Then rename connection name to 'streamyx' or anything you want. Enter your username, password and service as shown in picture below. Tick connect automatically if want to allow connection on startup. Click 'Apply' to finish

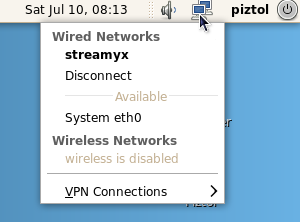
Click on applet again, and now streamyx connection should be appear under 'Wired Networks'. Select to connect.
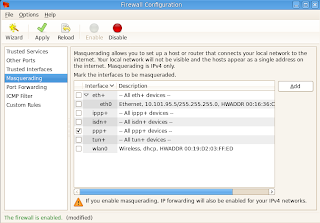
Step 2: Configure Firewall (from this step, all need to be done as root)
Open terminal and type
$ su
# system-config-firewall
Select 'Masquerading' and tick as bellow (thanks to KageSenshi)
Step 3: Setup DHCP server
First, install dhcpd (in fedora 12, dhcp package is using version 4)
# 'yum install dhcp
Check your DNS server to be used in dhcp configuration file
$ less /etc/resolv.conf
Output should be appear like this
# Generated by NetworkManager
nameserver 204.177.0.3
nameserver 204.177.1.12
Then, edit dhcpd configuration file (use familiar text editor such as gedit, vi or nano)
$ su -c 'gedit /etc/dhcp/dhcpd.conf'
Then, make it similar as bellow and match the address of DNS at 'option domain-name-servers'
# beginning of file
default-lease-time 86400;
max-lease-time 604800;
authoritative;
ddns-update-style interim;
option domain-name-servers 204.177.0.3
,204.177.1.12
;
subnet 192.168.1.0 netmask 255.255.255.0 {
range 192.168.1.1 192.168.1.5; # only 5 person can connect
option broadcast-address 192.168.1.6;
option routers 192.168.1.1; # gateway address
}
# end of file
Step 4: Create an Ad-Hoc connection
Enable wireless connection, then select 'Create New wireless Network'
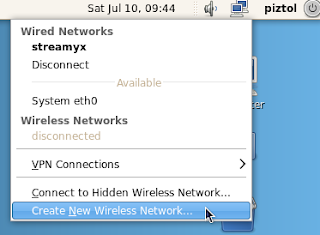
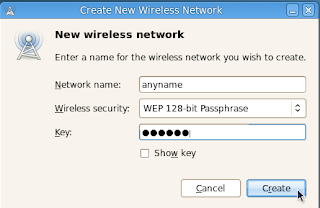
Choose any wireless security you want or simply choose none. Click 'Create' to finnish.
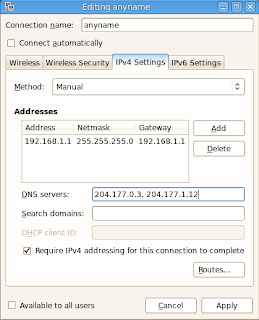
Again right-click on the network manager applet and choose 'Edit Connections'. Then, under 'Wireless' tab, select your connection name and edit as follow
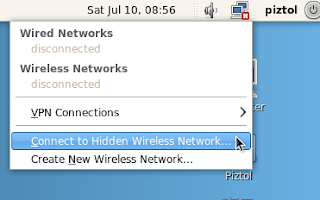
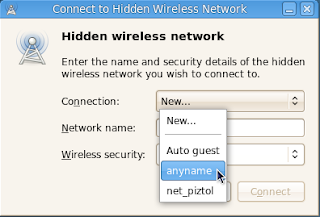
Click on applet, and select 'Connect to Hidden Wireless Network' and connect.
Finally, restart dhcp server
# sudo service dhcpd restart
Note that you need to connect to the created ad-hoc connection first (in my case, it is 'anyname') before you can start dhcp server.
Now, everyone near to you can see you Ad-hoc connection. Configure client's IP address using 'automatic configuration'. Once they connect to your ad-hoc connection through WiFi, they can surf to internet and facebooking all the time :P
References:
Sunday, June 13, 2010
IIUM FM
I'm IIUM student :) and I'm glad that IIUM has it own radio, which is broadcasting over the Internet. Users could simply go to this page http://livestream.iiu.edu.my/iiumfm/ and it will stream the radio using supported player in web browser. Nice huh?.. Hehe.
Beside that, for Linux user, you can simply use Rythmbox as follow:
Step 1: Make sure plugins are installed
ubuntu user,
$ sudo apt-get install ubuntu-restricted-extras
and fedora,
$ sudo yum install gstreamer-plugins-ugly gstreamer-plugins-bad gstreamer-ffmpeg
It is also necessary to install a bunch of codecs in here
Step 2: adding link
open your rythmbox, go to menu 'Music',click on 'New Internet Radio Station' and add this url
mms://livestream.iiu.edu.my/iiumfm
Then, go to side bar on Radio, then double click on the new added link.
That's it. Enjoy ;)
Monday, April 19, 2010
Fedora: Change Root Directory of Httpd
I recently try to install apache on fedora 12. I need to change the root directory to ease me editing file and avoiding permission. It is quite different when I was configuring on ubuntu. After read through several forums I come to this post. So, I won't be crazy for the next time.. haha
The default root directory is at /var/www/html. In my case, I want to change it to /home/user1/web.
Step 1: Edit apache configuration file (as root)
# gedit /etc/httpd/conf/httpd.conf
Find these two lines
DocumentRoot "/var/www/html"
...
...
#
# This should be changed to whatever you set DocumentRoot to.
#